- 使用 php 程式語言操作資料庫系統!
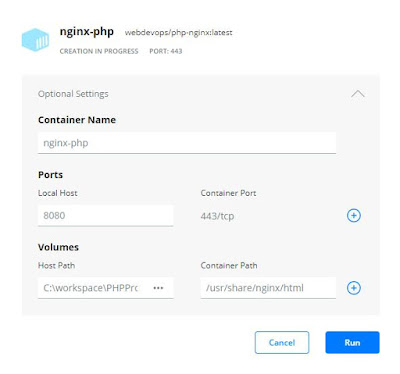
- 本練習將利用 Docker ,啟動 nginx + PHP 網站執行環境
- 本練習將利用 Docker ,啟動 mysql 網站執行環境
PHP 連結 MySQL 資料庫
- 利用 Docker,開啟 php-nginx 以及 mysql 兩個容器!
docker run --name nginx -d -p 443:443 -v c:\workspace\phpexercise:/app php-nginx
docker run --name mysql -d -p 3306:3306 -e MYSQL_ROOT_PASSWORD=Hello123 mysql:latest
- 登入 mysql 容器,進行帳號密碼設定:
docker exec -it mysql bash
mysql -u root -p
CREATE USER 'root'@'%' IDENTIFIED by 'Hello123';
ALTER USER 'root'@'%' IDENTIFIED WITH mysql_native_password BY 'Hello123';
GRANT ALL PRIVILEGES ON *.* TO 'root'@'%';
FLUSH PRIVILEGES;
exit
exit
- 遠端登入 MySQL ,建立使用者帳號、密碼,以及建立資料庫與授權!
mysql -u root -h 10.1.1.32 -p
CREATE USER 'peter'@'%' IDENTIFIED by 'World123';
ALTER USER 'peter'@'%' IDENTIFIED WITH mysql_native_password BY 'World123';
CREATE DATABASE hello;
GRANT ALL PRIVILEGES ON hello.* TO 'peter'@'%';
FLUSH PRIVILEGES;
exit
- 利用新建立的帳號,建立一個資料表:
mysql -u peter -h 10.1.1.32 -p use hello; CREATE TABLE connects ( id INTEGER PRIMARY KEY, name VARCHAR(150), email VARCHAR(150), phone VARCHAR(20) ) ENGINE=InnoDB; show columns from connects; exit - 測試連線是否正常:connections.php
<?php
//測試連線是否正常
try {

   $db = new PDO('mysql:host=10.1.1.32;dbname=hello','peter','World123');
   if (isset($db)) printf("Connection Success");
} catch(PDOException $e) {
    printf("Could not connect to the database: %s ",$e->getMessage());
}
?>
- 新增資料至 connects 資料表:
- 建立表單檔案:hello.htm
<!DOCTYPE html>
<html lang="en">
<head>
    <meta charset="UTF-8">
    <meta http-equiv="X-UA-Compatible" content="IE=edge">
    <meta name="viewport" content="width=device-width, initial-scale=1.0">
    <title>Document</title>
</head>
<body>
    <form action="hello.php" method="post">
        <label for="id">ID:</label>
        <input type="text" name="id"><br>
        <label for="name">Name:</label>
        <input type="text" name="name"><br>
        <label for="email">Email:</label>
        <input type="text" name="email"><br>
        <label for="phone">Phone Number:</label>
        <input type="text" name="phone"><br>
        <input type="submit" value="submit">
        <input type="reset" value="reset">
    </form>
</body>
</html> - 建立新增資料檔案 hello.php
<?php

require_once "connections.php";

$id = intval(trim($_POST['id']));
$name = trim($_POST['name']);
$email = trim($_POST['email']);
$phone = trim($_POST['phone']);

printf($id.$name.$email.$phone);

try {
  $runSQL = $db->prepare('INSERT INTO connects(id,name,email,phone) VALUES (?,?,?,?)');
  $runSQL->execute(array($id,$name,$email,$phone));
  $runSQL->fetchAll();
  printf ("Insert data success ...");

} catch (PDOException $e2) {
    printf("Could not connect to the database: %s ",$e2->getMessage());
}


?>
- 建立表單檔案:hello.htm
- 查詢資料方式
- 新增查詢資料檔案:lists.php
<!DOCTYPE html>
<html lang="en">
<head>
    <meta charset="UTF-8">
    <meta http-equiv="X-UA-Compatible" content="IE=edge">
    <meta name="viewport" content="width=device-width, initial-scale=1.0">
    <title>Document</title>
</head>
<body>
    <table border="1">
        <tr>
            <th>ID</th>
            <th>Name</th>
            <th>Email</th>
            <th>Phone</th>
        </tr>
        <?php

            require_once "connections.php";

            $runSQL = $db->prepare("SELECT * FROM connects;");
            $runSQL->execute();
            printf("<tr>");
            while ($row = $runSQL->fetch()){
                printf("<td>%d</td>",$row[0]);
                printf("<td>%s</td>",$row[1]);
                printf("<td>%s</td>",$row[2]);
                printf("<td>%s</td>",$row[3]);
            }
            printf("</tr>");
        ?>

    </table>

</body>
</html>
- 新增查詢資料檔案:lists.php
- 修改資料內容:
- 新增修改內容的表單:modify.html
<!DOCTYPE html>
<html lang="en">
<head>
    <meta charset="UTF-8">
    <meta http-equiv="X-UA-Compatible" content="IE=edge">
    <meta name="viewport" content="width=device-width, initial-scale=1.0">
    <title>Modify Data</title>
</head>
<body>
    <form action="modify.php" method="POST">
        <label for="">指定姓名:</label>
         <input type="text" name="name"><br>
        <label for="">修改電話:</label>
        <input type="text" name="phone"><br>
        <label for="">修改 E-mail:</label>
        <input type="text" name="email"><br>
        <input type="submit" value="Submit"><input type="reset" value="Reset">
    </form>
</body>
</html> - 新增修改內容的程式:modify.php
<?php
    require_once "connections.php";

    if (is_null($_POST['name'])){
        echo "<script>alert('退出!');history.back();</script>";
    }
    if (!(is_null($_POST['phone']))){
        $phone = trim($_POST['phone']);
        $name = trim($_POST['name']);
        $runSQL = $db->prepare("UPDATE connects SET phone = ? where name = ?;");
        $runSQL->execute(array($phone,$name));
    }

    if (!(is_null($_POST['email']))){
        $email = trim($_POST['email']);
        $name = trim($_POST['name']);
        $runSQL = $db->prepare("UPDATE connects SET email = ? where name = ?;");
        $runSQL->execute(array($phone,$name));
    }
    echo "<script>alert('退出!');history.back();</script>";
?>
- 新增修改內容的表單:modify.html
- 刪除資料內容:
- 新增刪除內容的表單:del.html
<!DOCTYPE html>
<html lang="en">
<head>
    <meta charset="UTF-8">
    <meta http-equiv="X-UA-Compatible" content="IE=edge">
    <meta name="viewport" content="width=device-width, initial-scale=1.0">
    <title>Document</title>
</head>
<body>
    <form action="del.php" method="POST">
        <label for="">指定姓名:</label>
         <input type="text" name="name"><br>
        <input type="submit" value="Submit"><input type="reset" value="Reset">
    </form>
</body>
</html> - 新增刪除內容的程式:del.php
<?php
    require_once "connections.php";

    if (is_null($_POST['name'])){
        echo "<script>alert('退出!');history.back();</script>";
    } else {

        $name = trim($_POST['name']);
        $runSQL = $db->prepare("DELETE FROM connects where name = ?;");
        $runSQL->execute(array($name));
    }

    echo "<script>alert('退出!');history.back();</script>";


?>
- 新增刪除內容的表單:del.html


