- Laravel 環境安裝與開發工具設定
- 使用 Composer 套件管理工具,安裝 Laravel 開發環境
- PHP 資料型態
2021年2月25日 星期四
Web APP 網站後端進階程式設計-使用 Laravel
進階學習路徑目錄與資料索引
利用 Podman 來建立 PHP 網站執行環境
設定目標:
- 在 CentOS 8 上安裝 podman
- 利用 podman ,啟動 nginx + PHP 網站執行環境
-
在 CentOS 8 安裝容器 podman :
#dnf install epel-release
#dnf install podman
#podman --version
2021年2月22日 星期一
PHP 環境安裝(一)
設定目標:
- 在 CentOS 8 上使用 VSCode 做為 PHP IDE 環境
- 在 CentOS 8 上安裝 PHP 8:
#dnf install -y https://rpms.remirepo.net/enterprise/remi-release-8.rpm
#dnf module list php
#dnf module enable php:remi-8.0 -y
#dnf module install php -y
#php --version
-
安裝 VSCode :
#dnf install code
-
使用一般使用者來啟動 VSCode:
$code &
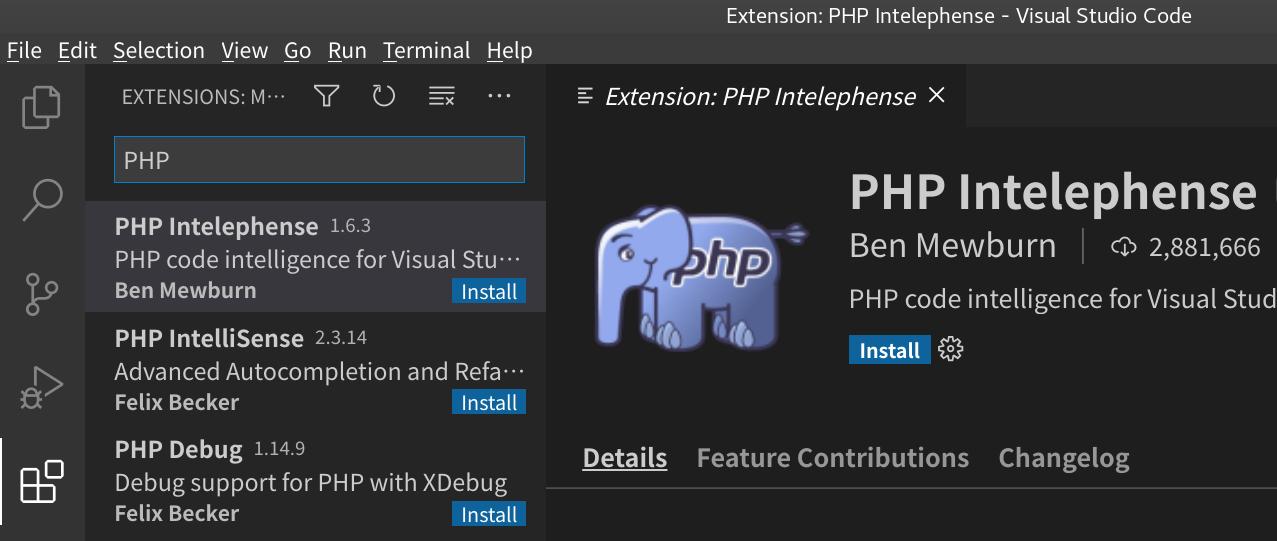
- 使用 VSCode 的 Extension 功能,輸入 PHP 關鍵字,並選擇 Intelephense 套件進行安裝:

-
在 VSCode 中,設定 PHP 解譯器路徑:
a. <Ctrl>+<Shift>+<p>
b.輸入並執行 Perferences: Open Settings(JSON)
c.在檔案中,加入適當的 php 路徑:
-
建立一個 PHP 檔案:hello.php
a.按下工作列上的 File -> NewFile
b.輸入程式內容:<?php print "Hello World"; ?>
c.按下工作列上的 File -> Save As ...
d.選擇儲存的目錄,並且輸入檔案名稱:hello.php
e.在工作列上,選擇 Terminal -> New Terminal f.在 Terminal 視窗中,執行 hello.php :$php hello.php
-
在 CentOS 8 上安裝 php-pecl-xdebug3 套件:
dnf install php-pecl-xdebug3
- 使用 VSCode 的 Extension 功能,輸入 Xdebug 關鍵字,並選擇 PHP Debug 套件進行安裝:

-
修改 hello.php 檔案:
<?php
  print "Hello World";
  xdebug_info();
?>
-
在 Terminal 視窗中,執行 hello.php :
$php hello.php


Web APP 網站後端初階程式設計-使用 PHP
初階學習路徑目錄與資料索引
- PHP 環境安裝與開發工具設定
- PHP 基本認知
- PHP 資料型態與運算子
- PHP 控制結構與迴圈
- PHP 函數應用
- PHP 類別與物件(一)
- PHP 類別與物件(二)
- PHP 錯誤與例外處理
- PHP 檔案處理
- PHP XML與資料庫處理
- PHP 網路程式
- PHP 單元測試
- 將課堂練習上傳至您的 github 內!以章節分類的方式,放置檔案!
2021年2月17日 星期三
訂閱:
文章 (Atom)